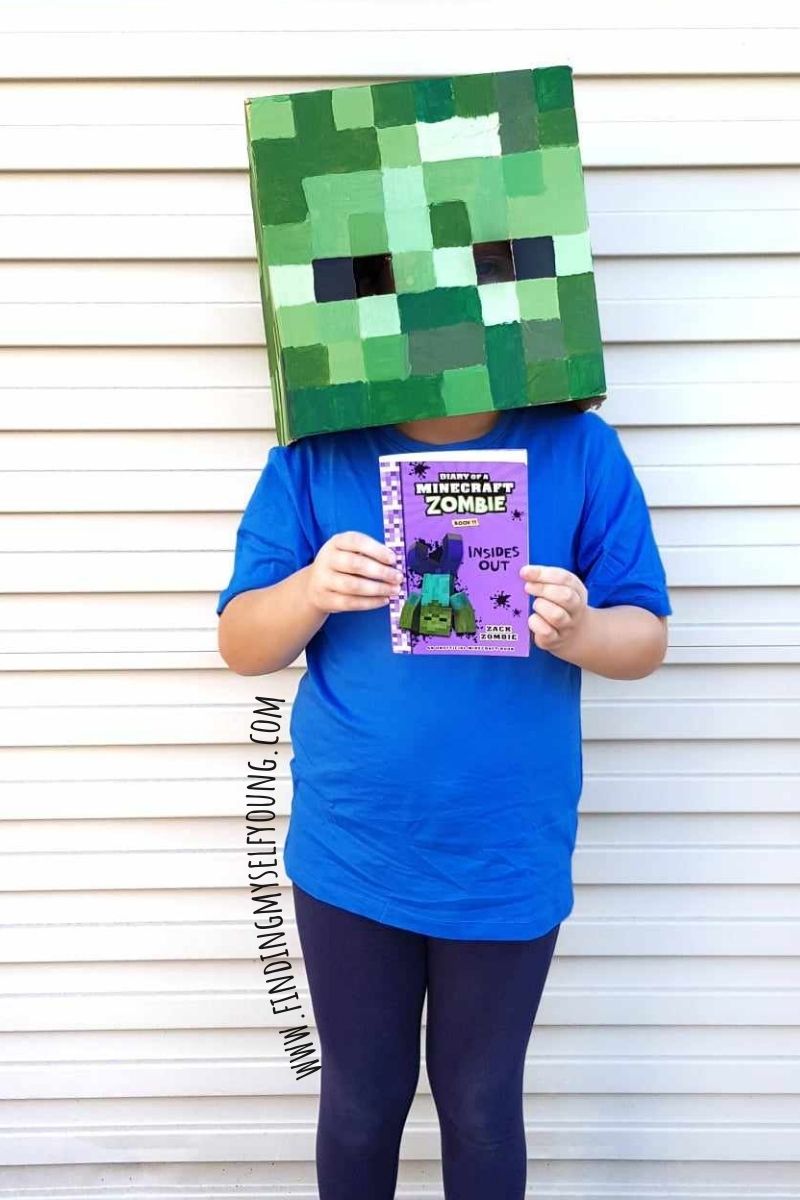
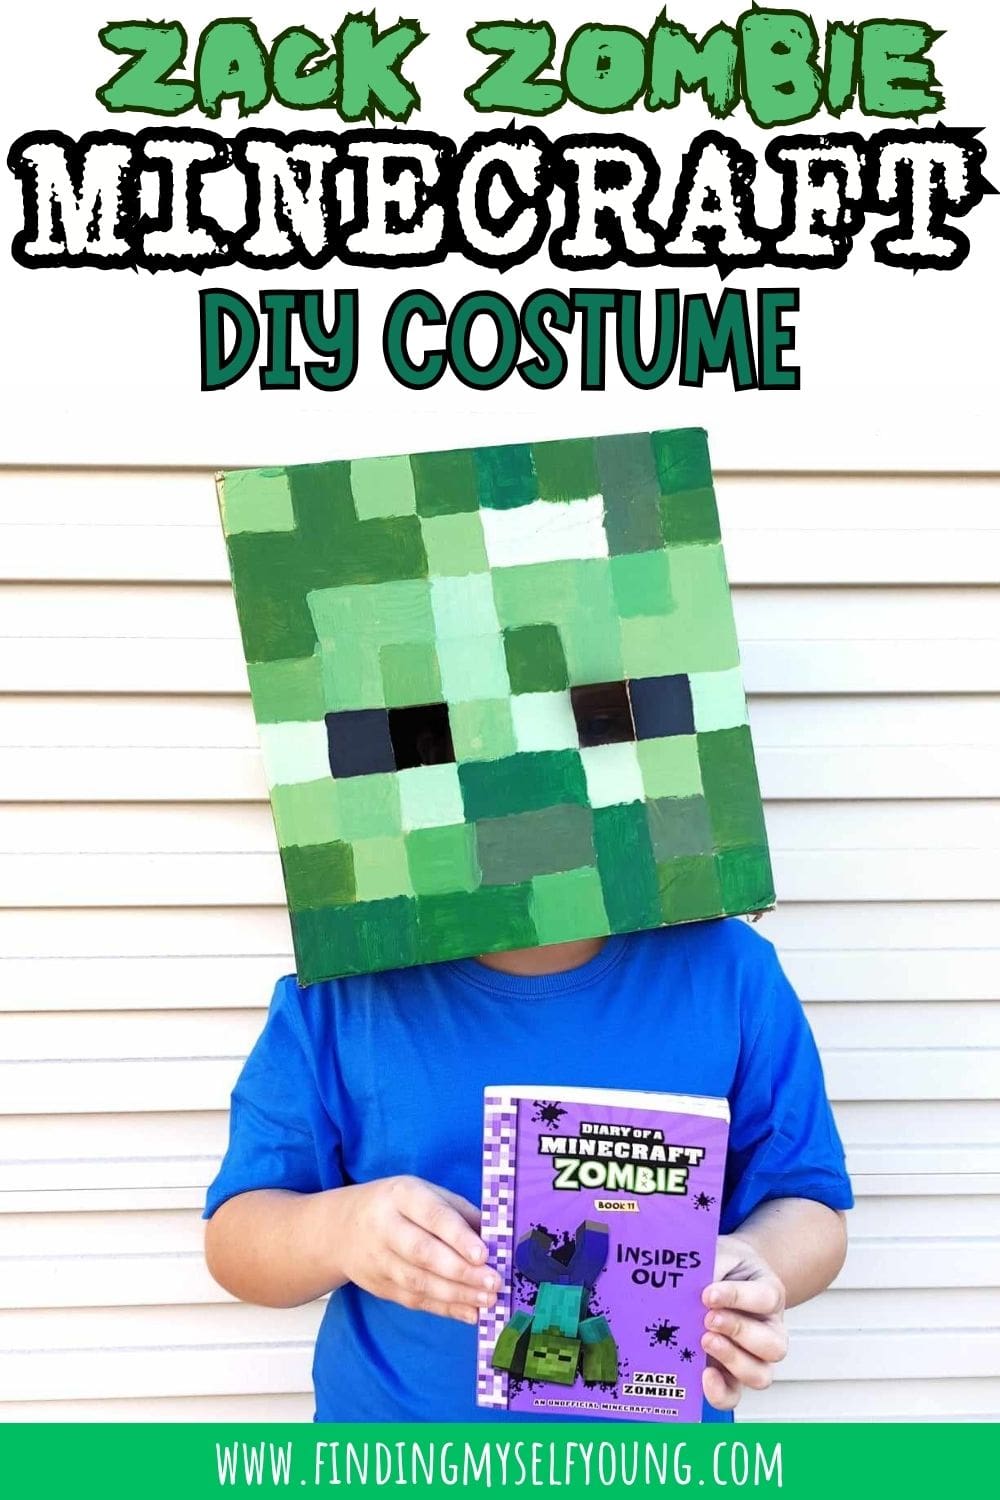
If your kids are into the Diary of a Minecraft Zombie books as much as mine, chances are they'll want to dress up as Zack Zombie for Halloween, or book week. We made our own DIY Zack Zombie costume for less than $10 and I've written up all the steps to make it super easy for you to make your own too.
WHO IS ZACK ZOMBIE?
Zack Zombie isn't in the popular Minecraft game, however he is the main character of the series Diary of a Minecraft Zombie. Zack is a 12yr old Minecraft zombie who lives with his parents and attends Scare School {middle school}.
Each book in the series follows the life challenges he faces as a pre-teen zombie. There are currently 41 books in the series, book number 41 Runaway Teen Mob was just released on September 1st.
HOW TO MAKE A DIY ZACK ZOMBIE COSTUME
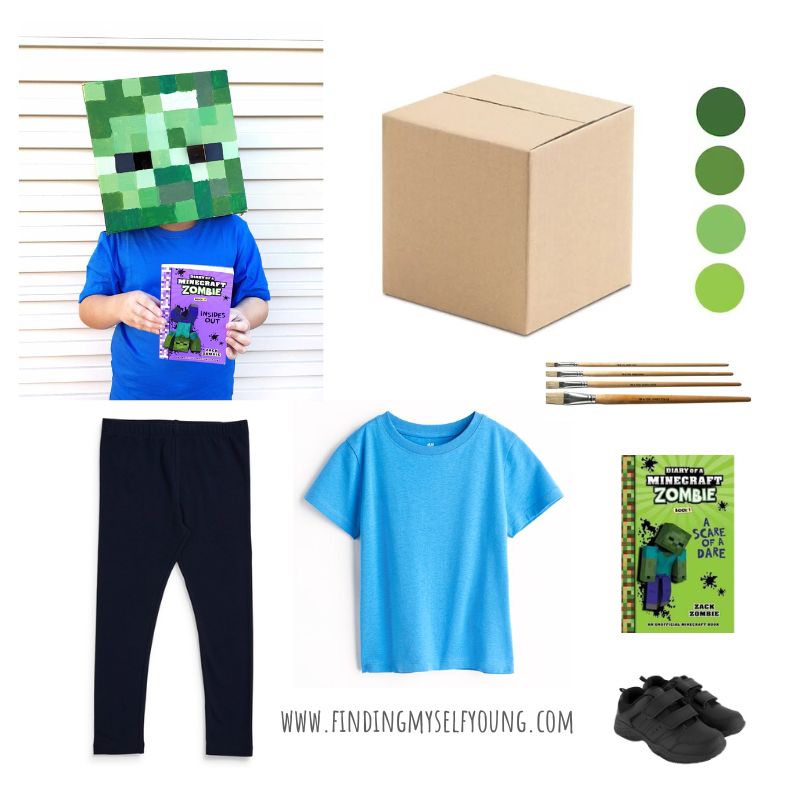
If you want to take the super easy route you can always buy a premade Zack Zombie costume from Amazon or Amazon AU, however it's actually really easy to DIY a costume. In fact there's no sewing involved as you can purchase the individual clothing items {if you don't already have something suitable}, all you need to actually make is the pixelated Minecraft head.
For a Zack Zombie costume you will need:
- Ruler
- Pencil
- Paintbrush
- Stanley knife
- Green, black & white paint
- Square cardboard box
- Aqua/blue t-shirt
- Dark blue pants
- Dark shoes
The only item I initially had to purchase for our costume was a blue t-shirt which cost $3.50. An aqua t-shirt is the ideal colour, however any shade of blue t-shirt will do if you already have one. Unfortunately I couldn't find an aqua t-shirt in my daughter's size despite trying many shops, so we settled for a royal blue.
I had dark leggings, shoes, a cardboard box and all the other items I already needed at home. While painting the cardboard box head I did end up running out of green paint so I had to go buy another tube which cost $4. In the end our entire Zack Zombie costume cost us $7.50
HOW TO MAKE A DIY ZACK ZOMBIE MINECRAFT HEAD
1. Find a square box that is the correct size for your child's head. Re-use a box from an online order, or most hardware stores usually allow customers to take used boxes.
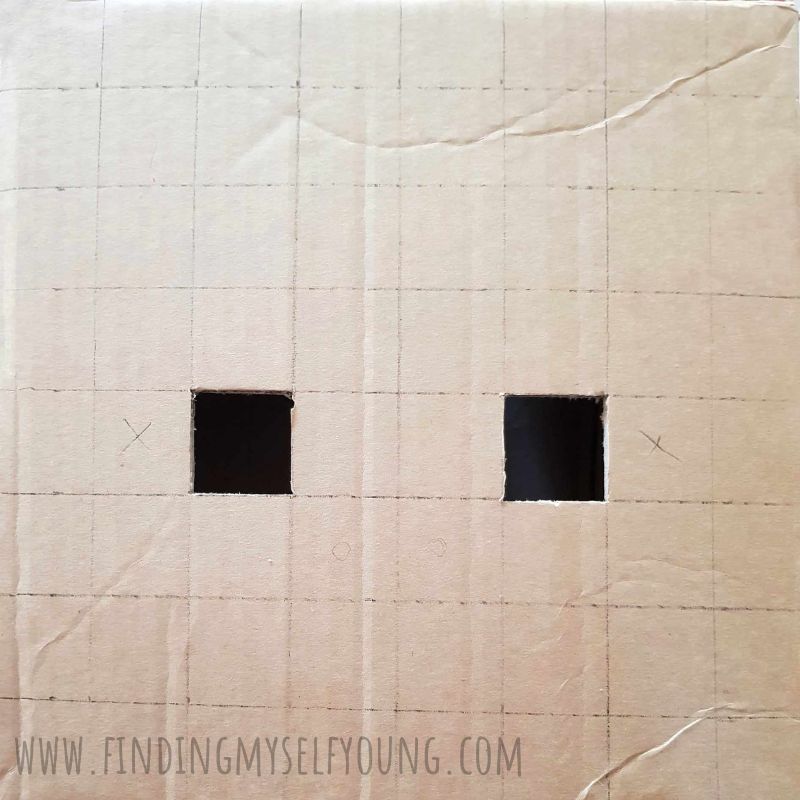
2. Use a ruler to measure each side of the box into 8 horizontal rows and 8 vertical rows. Zack's head is 8x8 rows of pixels, so you'll recreate this by drawing rows across your cardboard box. The incremental measurements of each row will depend on the size of your box, but divide the length and width by 8 to determine where to outline your squares.
3. Draw the lines in pencil to create the individual square pixels. Using pencil to mark the lines makes it easier to rub them out once the box is painted.
4. Find the eye pixels and mark them out. On the front face find the squares that are 5 rows down from the top of the box and 3 spaces across from the outer sides of the box. These squares will be cut out to form eye holes. The pixels directly on the outer side of these squares will be painted black. See photo below for reference.
5. Carefully cut out the 2 inner eye hole squares with a stanley knife.
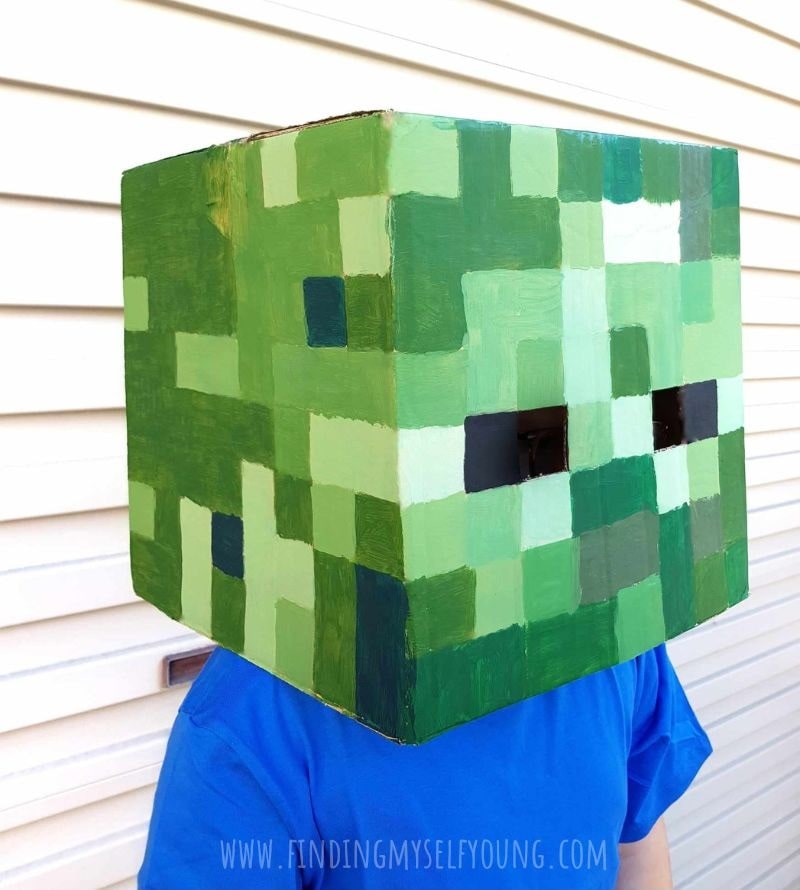
6. Use a reference image of Zack Zombie's pixelated head as a guide to paint the individual squares in different shades of green. Paint one side of the box at a time then allow to dry.
I used the above image I found at Printablee as a general guide for the shades of green for each section of Zack's head. I made lighter and darker greens by adding white or black paint to the green paint.
7. Repeat step 6 until all sides of the box are painted.
FINISHED ZACK ZOMBIE COSTUME
In total the Minecraft zombie box head took me about 3hrs to paint, which I did across 4 different days as I had to let each side dry enough to start the next side. My daughter helped me paint the first side, but quickly got bored painting squares, so I ended up painting approximately 90% of the head.
You can see on ours we didn't use tape to keep the lines perfect so there's some bleed through between the squares and you can see the brush strokes, however I think that's part of the homemade charm.
We were going to incorporate Zack's green zombie arms into the costume, however it was too hot for my daughter to wear a long sleeve green shirt under the blue t-shirt, so she just left her arms plain. I've added more tips down below how you can alter the costume, including how to add zombie arms.
More tips for making a Zack Zombie Minecraft costume
Print out images of Zack Zombie's head and glue them to the cardboard box. If you don't want to spend a few hours painting your cardboard box, you can print out enlarged versions of this free printable Minecraft zombie head and glue them to each side of the box instead. Make sure the images are sized correctly before printing.
Use paint pens. If you want to paint the cardboard box yourself, but want a more polished finish rather than messy brush strokes, use paint pens to colour the square pixels. You will need paint pens in black and at least 3 different shades of green.
Add green arms. To make the costume even more zombie like, add some green to your child's arms by either wearing a long sleeved green t-shirt under the blue one, or painting their arms with green body paint.
Make Minecraft box arms. If you want to be super realistic to Zack's pixelated body, make cardboard rectangles to slip over your child's arms. Paint them blue at the top where the t-shirt sleeve would be, then green for the rest of the arms.
MORE DIY COSTUME IDEAS
Disclosure - This post contains some affiliate links for your convenience, which means that I may make a small commission at no cost to you, should you make a purchase.

