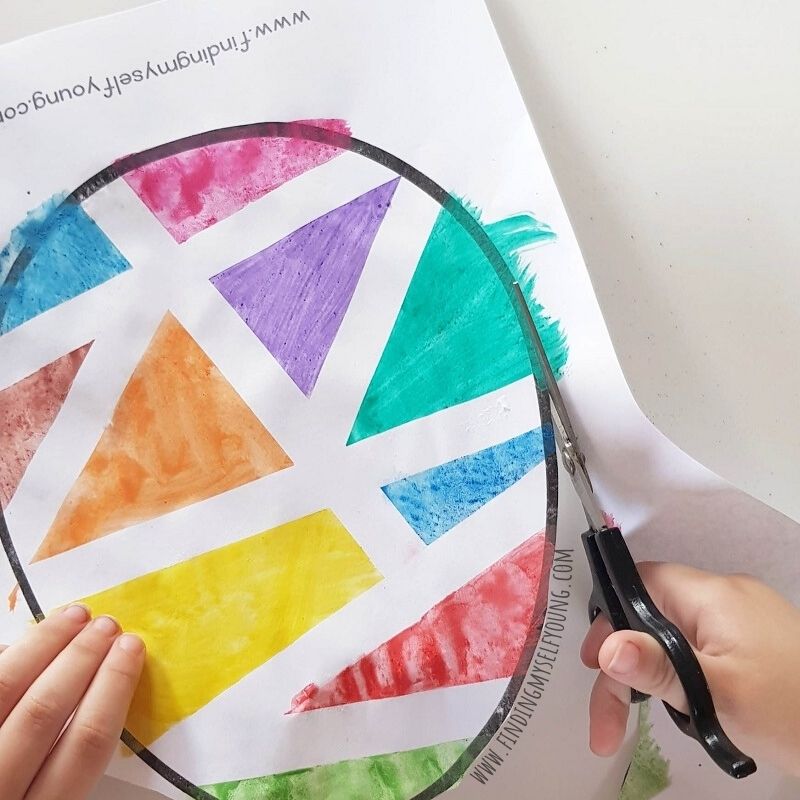
If you don't want to decorate real eggs for Easter, don't worry, your kids can still get creative and decorate paper Easter eggs instead. This tape resist Easter egg is an easy Easter paper craft for toddlers, preschoolers and school kids. The finished colourful Easter eggs make a great art display at home or in the classroom.
TAPE RESIST EASTER EGG CRAFT + FREE PRINTABLE
Tape resist art is a process art technique that involves using tape to create an area of resistance within a painting. Tape resist painting involves layering tape and then paint to create a pattern or image with blank space where the tape was.
Making a tape resist Easter egg painting is a great way for kids to get creative whilst also building their fine motor skills as they tear and stick the tape, blend the paint, hold the paintbrush, paint the egg and cut out the template.
Supplies needed to make tape resist eggs
- White paper
- Egg template {see below}
- Watercolours
- Washi tape
- Paintbrush
- Water cup
If you have young children chances are you already have all of the craft items needed to create these tape resist Easter eggs. If you don't you can find them at dollar stores, craft stores {like Riot} or department stores.
It's best to use washi tape as the tape for this craft as it's easy for kids to tear into pieces and stick down and it peels back off of the paper relatively easy without causing damage. If you have it you could also use artist's tape, however normal sticky tape and masking tape will damage the paper.
EASTER EGG FREE PRINTABLE TEMPLATE
To make this tape resist egg craft easier, and other Easter egg paper crafts, I've made a simple blank egg template that you can download and print off. For best results print on white cardstock, however we've used it on paper with no problems.
Please note this free printable template is for personal or classroom use only, it cannot be reproduced, published or sold in any form on any platform.
HOW TO PAINT A TAPE RESIST EASTER EGG
Once you've gathered all your supplies, follow these step by step instructions to create tape resist Easter egg art. If you're doing this as a group activity with younger children I suggest doing steps 1 & 2 beforehand to save time.
1. Print off blank Easter egg template. One per child.
2. Create a geometric pattern across the template with washi tape. Make sure the tape is pressed down properly to avoid any paint bleeding. Older children will be able to do this step themselves while younger children may need assistance.
3. Paint each section of the egg with a different colour of paint. Be careful not to make the watercolour too watery or the paper may deteriorate.
4. Set aside painted Easter egg to dry. Ours took approximately 20 minutes to fully dry.
5. Carefully peel off each piece of washi tape starting with the top layer. The washi tape is relatively easy to peel off, however you want to do it slowly as you can accidentally rip the paper underneath if you pull it off too fast. I did this step for my 5yr old.
6. Cut out the egg template. This is great scissor skill practice for children who are learning to use scissors. Toddlers and preschoolers will likely need assistance.
7. Display completed egg painting. They can also be stuck on large Easter cards, laminated to keep, or hung together as a garland.
If you're looking for more Easter craft or play inspiration please come and join our Facebook group Easter Craft, Play and DIY Ideas. There are also more Easter craft ideas at the bottom of this post.
MORE EASTER CRAFT IDEAS
Disclosure - Please note this post contains some affiliate links for your convenience, which means I may make a small commission at no cost to you, should you make a purchase.


