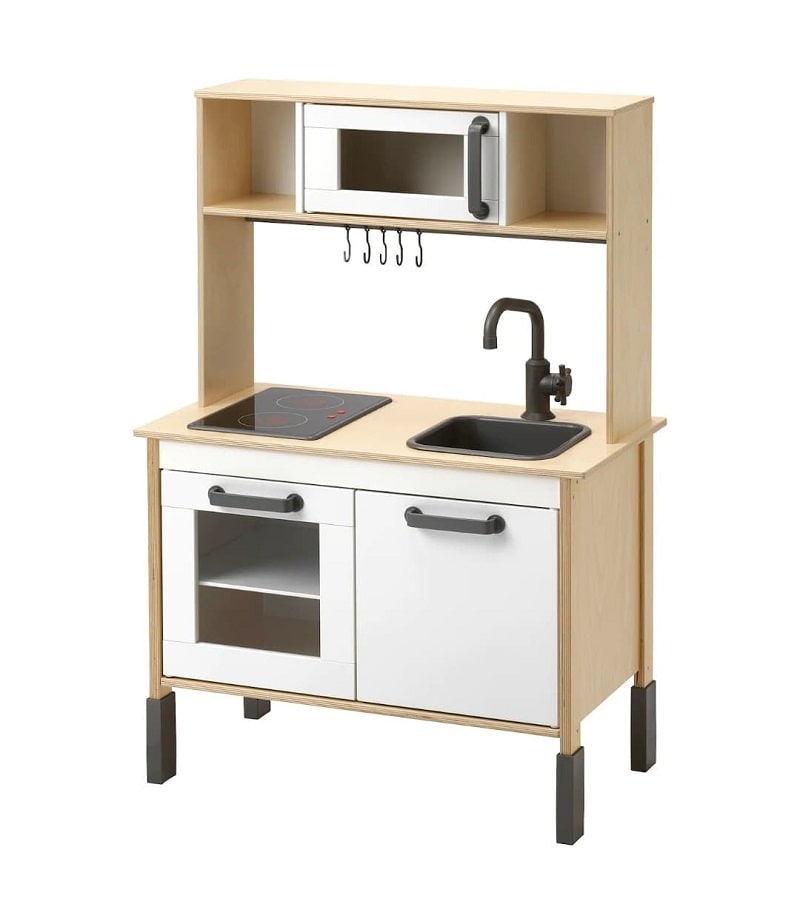
The Ikea Duktig kitchen is the perfect play kitchen for so many families because of it's compact and minimalist design. It's a great space saving option, especially for families living in apartments and small homes. It's neutral Scandinavian design also makes it the perfect blank canvas for an awesome Ikea hack. You can literally transform it to match any style or decor, so it'll blend into your home or playroom seamlessly.
The play kitchen was one of the first Ikea items we bought for the kids and it's hands down been our best Ikea purchase ever {and trust me, we've got a lot of Ikea products in our playroom}. Our kitchen has been going strong for 6 years now and both of our girls still play with it daily. It's one of our best open ended toys, sometimes it's a kitchen then other times it's a supermarket, bakery or coffee shop... the possibilities are really endless with a little imagination.
If the plain colours aren't to your taste though, don't worry, I'm going to show you 13 different ways you can transform the Ikea Duktig kitchen into the play kitchen of your, I mean your kids dreams. It doesn't matter if you're going for a retro, modern, farmhouse or vintage vibe, by doing some, or all, of these hacks you can turn the Ikea kitchen into the ultimate play kitchen for your space. You can even transform it into a mini replica of your actual kitchen.
MAKE YOUR DUKTIG PLAY KITCHEN UNIQUE WITH THESE SIMPLE IKEA HACKS
1. PAINT THE HARDWARE
A simple way to update the kitchen and make it look unique is to paint some, or all of the hardware. The handles, tap, sink and rail all come in a plastic imitation stainless steal, but if you want to change them it's easy to do with some spray paint. Rustoleum spray paint is the most popular choice as it acts as a primer and a paint all in one and it comes in various matt and metallic finishes.
Scarlett from Fork & Flower transformed the hardware in her daughter's kitchen using copper Rustoleum spray paint. She also sprayed the plastic hooks to match.
 |
| Image: Fork & Flower |
2. UPDATE THE HANDLES
To quickly change the look of the Ikea kitchen, swap out the plastic handles with any handle of your choice. You can even get special leather handles and hooks designed to fit the Duktig kitchen. The set shown below is from Slaska LAB on Etsy and comes in a range of colours with the option to buy just the handles, hooks, or both.
Of course there's an endless number of options when it comes to handle designs. Whether you're going for a scandi, rustic, retro, art deco or clean modern look you'll be able to find cabinet handles that suit from either local hardware stores, Etsy or Amazon. Just make sure you get handles that have a hole to hole measurement of 128mm to fit the Duktig cabinets.
3. ADD A BACKSPLASH
The Duktig comes with a backing board behind the microwave and shelf sections, however the backsplash is left hollow. To make it look more realistic, attach a backsplash using some MDF board and printed wallpaper, vinyl contact paper or stick and peel tiles. Tile stickers give the look of real tiles but are really simple to apply and won't fade over time {plus no grout to clean, winning!}.
Adhesive tiles can be found in hardware stores and many online stores. Little Pop Of Colour have blacksplash stickers, already cut to size for the Ikea kitchen, available in a range of tile designs on Etsy. FUN LIFE Home Decor also have a large range of peel and stick tiles available online in subway, mosaic, herringbone and marble designs, all with free shipping. Another great option is Tic Tac Tiles who specialise in adhesive tiles, with prices starting as low as $5.99 a sheet. Always remember to check the measurements of tile sticker sheets to ensure you order enough as sizes do vary between brands.
4. COVER THE BENCH TOP
The Duktig bench top is made from birch plywood which gives a nice pale wood bench top, however if you want to change it up it's really simple to do with some vinyl contact paper. The kitchen bench top below was covered with butchers block contact paper to give a darker wood look {you can get similar ones from Etsy here}.
There's also many different marble and granite look vinyl contact papers available on Etsy. If you don't want to have to measure and cut out contact paper then there's this marble bench top decal from Stickea that is designed specifically to fit the Duktig kitchen. Alternatively you could stain the bench top or paint it if you just want one plain colour.
5. CHANGE THE CABINET COLOURS
An easy way to make a big impact is to change the cabinet colours and/or paint the wood surround. Make a bold statement with bright colours, tone things down with pastel hues or give a vintage vibe with shades of mustard. Jamie Leigh Miller updated her daughters play kitchen {pictured below} with an almost terracotta colour, Bear Claw, as well as some new handles and a backsplash. How gorgeous does it look?!
If you want an even easier option than painting, there's a few stores on Etsy like Made Of Sundays and Little Pop Of Colour that sell coloured sticker panels already cut to fit the Ikea kitchen cabinets in a variety of colours.
6. ADD MICROWAVE BUTTONS
To bring the microwave to life add some button decals so kids can pretend to set the time and turn the microwave on. There are plenty of different microwave decal sticker designs to choose from on Etsy, below are my favourite ones.
1. Little Pop Of Colour, 2. Hwickmann, 3. Little Skurk Skjern, 4. Rock and Leaf Designs, 5. Stickea. The designs are also available in multiple colours.
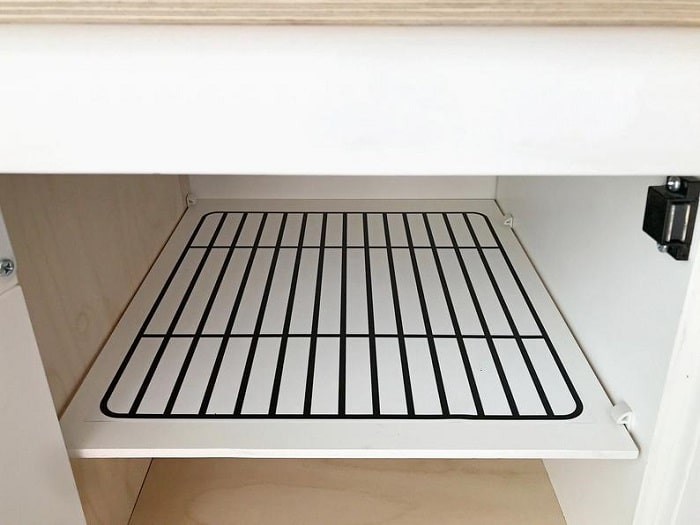
7. ADD AN OVEN RACK
I know technically the shelf inside the left hand cabinet already acts as an oven rack, however you can make it even more realistic by adding an oven rack decal. Imagine how much excitement the kids will have baking cookies and cakes on a real oven rack. The decal pictured below is from Stickea on Etsy. Rock and Leaf Designs also have an oven rack decal available in multiple colours.
 |
| Image: Stickea |
8. ADD OVEN DIALS
To make the oven even more interactive you can add some dials so the kids can pretend to set the timer and temperature like a real oven. The below oven stickers are all from Etsy. 1. Stickea, 2. Little Pop Of Colour, 3. V1 Trading, 4. Rock and Leaf Designs.
If you don't want to use stickers you could drill real cabinet knobs into the panel above the oven. You can find many different knobs from basic to decorative vintage styles at local hardware stores or online at Catch or Amazon.
9. ADD DISHWASHER BUTTONS
The cabinet on the right hand side doesn't necessarily have to be anything other than a kitchen cabinet, however with the addition of a few stickers you can transform it into a dishwasher. Because what kitchen doesn't need a dishwasher, right? The dishwasher stickers in top image below are from Stickea and the bottom is from Little Skurk Skjern on Etsy.
 |
| Image: Stickea |
10. CREATE A FRIDGE
If a dishwasher doesn't take your fancy, then you can easily make the right hand cabinet into a fridge with a simple decal. Our cabinet is basically a fridge as that's where the girls store all their play food, but an ice dispenser would take it to the next level. The fridge decal below is available from Stickea on Etsy.
 |
| Image: Stickea |
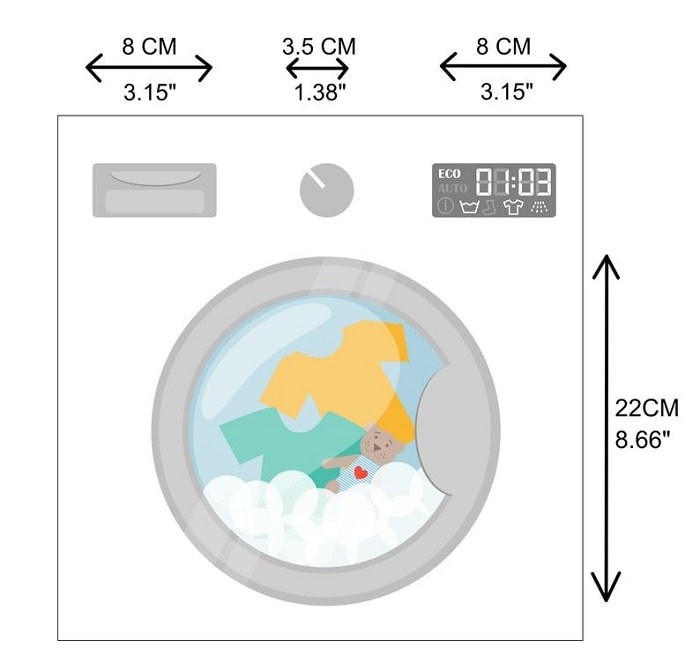
11. ADD A LAUNDRY
I know, a laundry in the kitchen might sound like a weird concept to some, but when I was in my early twenties I lived in a townhouse where the washing machine was in the kitchen to save space. It's also common place in many European countries. If you want to recreate that in the Ikea kitchen it's easy to do with a washer dryer decal. The decals below are from Stickea and there are also some cute ones available from Rock and Leaf Designs and a digital file from Lilous Magic World.
 |
| Image: Stickea |
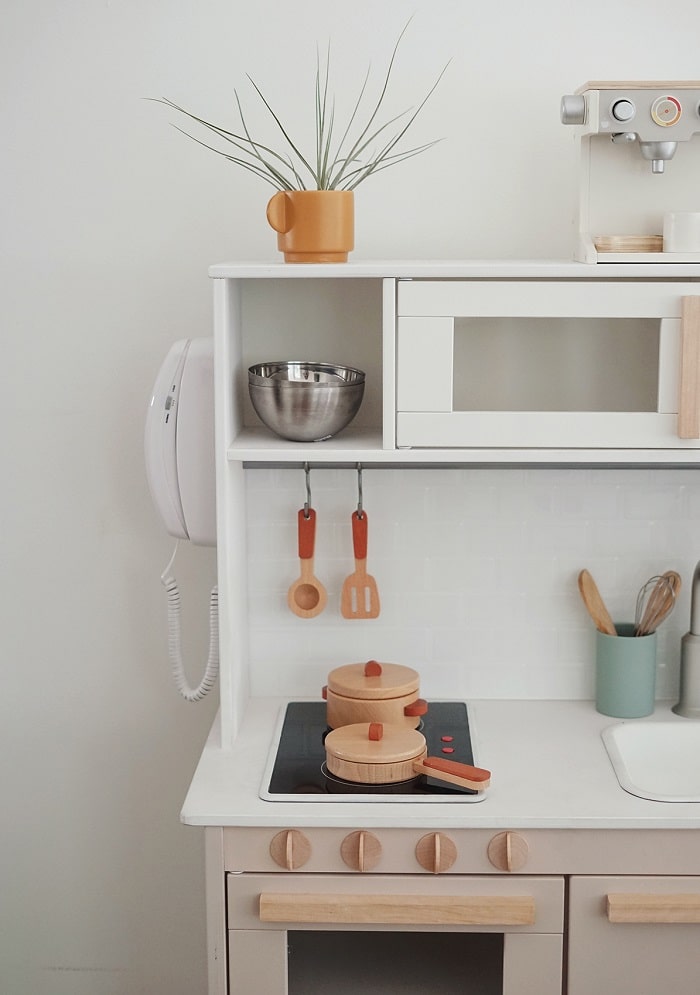
12. ADD A PHONE
Another super cute addition to a play kitchen is a phone. If your kids are like mine then they'll love a good chat on the phone. You can use any toy phone you like, for example this Honeybake vintage phone from Le Toy Van, or you could even use an old phone that no longer works {be sure to remove any power cord leads}.
If you want to save precious bench space you could add a wall phone like Molly from Almost Makes Perfect did in the image below {you can read about her Ikea kitchen hack here}. Bunnings and other outdoor play stores sell plastic wall phones that would work, or the specific one Molly used is linked below.
13. TRANSFORM YOUR PLAY KITCHEN INTO A SHOP
The great thing about the Ikea play kitchen is that it's pretty much a blank canvas and with a little imagination your children can turn it into anything they want, it doesn't always have to be a kitchen. With these awesome juice bar decals from Zoey Zo Kids Concept your Ikea kitchen can be easily transformed into a juice bar complete with a menu board.
 |
| Image: Zoey Zo Kids Concept |
If you want to make a shop, but not a juice bar, Zoey Zo Kids Concept also has ready made decals for a supermarket, sushi stand, ice cream shop, burger shop and Italian restaurant {plus others}. There's also lemonade stand, bakery and coffee shop decals available from Stickea.
If you don't want a specific shop decal then you could paint the back of the Ikea kitchen with chalk board paint and use chalk to change up which shop the kids want it to be. Or you can use dramatic play printables from Little Lifelong Learners to turn the kitchen into a donut shop, farmers market, ice-cream parlour, coffee shop, flower shop or pizza shop.
To keep up to date with my latest posts, play activities and book lists you can sign up to my email list or follow me on Instagram, Pinterest & Facebook. I'd also love for you to join parents from all around the world in our Facebook community.
Disclosure - This post contains some affiliate links for your convenience which means I may earn a small commission, at no cost to you, should you make a purchase. All Ikea hack photos featured in this post have been used with express permission.


Love all these ideas! I cannot wait to make one of these for a birthday gift!
ReplyDelete